Testing, optimizing and improving your website’s functionality can quickly become expensive, especially when using online tools or hiring CRO experts. While this is usually a smart investment for startups struggling businesses and Internet marketers, spending hundreds or thousands of dollars to optimize a website is out of the question.
If you fit into any of the groups above, or if you are looking for a free A/B testing tool, Google has answered your prayers with Google Analytics Content Experiments (formerly known as Google Website Optimizer). In this article, I’ll show you how to use Content Experiments to test various pages and create bespoke goals.
What is Content Experiments?
Content Experiments is a free website testing tool found in Google Analytics. It allows you to test websites for predefined or bespoke goals. You can test several pages at once, create your own objectives,bandit test, allocate traffic as you wish and set numerous goals to be measured at once. While it is not as advanced as other A/B testing tools on the market, Content Experiments still packs a powerful punch and is great for entry level testing.
Getting Started
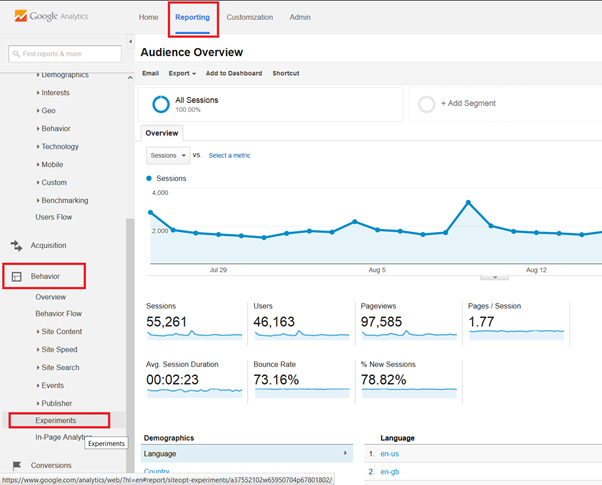
If you don’t already have a Google Analytics (GA) account linked to your website, you can sign-up for free by clicking here and then follow this article to link your website to GA. From there, find your website on the dashboard then head to the Reporting panel, look up Behavior on the left sidebar and select Experiments:
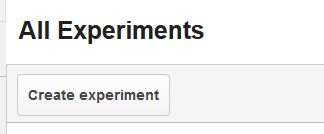
On the following page click Create experiment to start your first test:
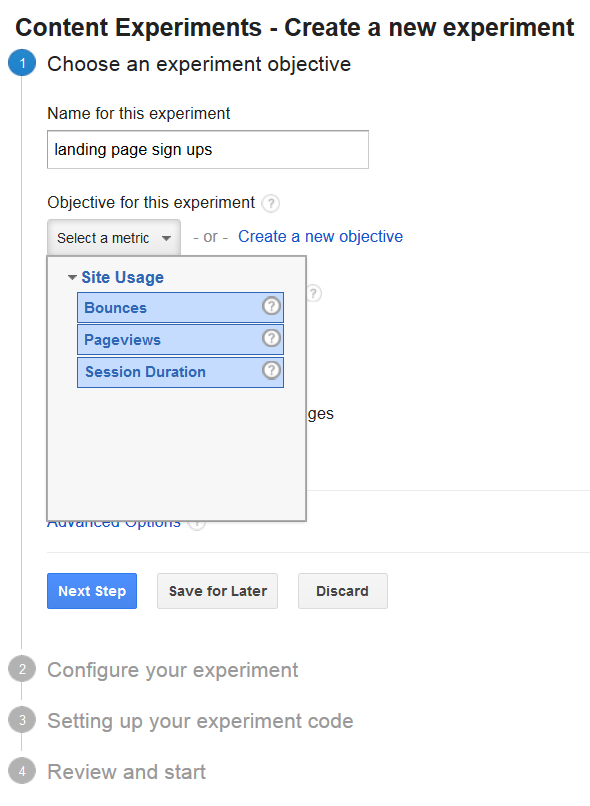
Content Experiments will ask you to name your experiment. I’ve decided to call my test “landing page sign-up” because I want to test two landing pages to find which converts better. The experiment name is only seen internally. Now comes the interesting part, you select what you wish to test. By default, Content Experiments lets you test Bounces, Pageviews or Session Duration. If you wish to create your own objective, click Create a new objective:
If you’ve decided to create your own objective, you will be presented with the following screen:
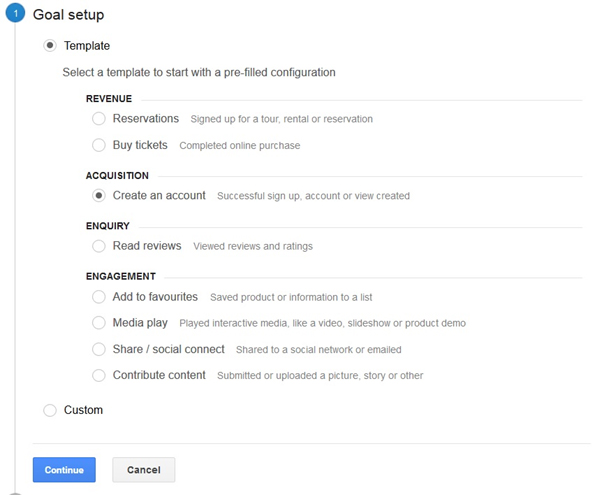
You can setup goals that measure the following:
- Revenue
- Acquisition
- Enquiry
- Engagement
- Custom
I’ve selected acquisition since I’m testing to see how many prospects opt-in to each of our landing pages.
“If you decide to create your own objective, you’ll be redirected to the Admin section of GA and will need to return back to Reporting > Behaviour > Experiments once your goal has been created to finishing setting up your experiment.”
Goal Slot ID
If you’ve chosen to create your own objective, each goal you create must be given a unique ID. You’re given up to 20 goal slots IDs that can be divided into 5 the individual goals listed above.
For a conversion to be recorded you must define the action prospects must trigger. Actions include:
- Destination – user lands on a specific page
- Duration – user stays on your website for a set amount of time
- Pages/Screen per session – user visitors a set amount of pages
- Event – user takes a specific action on your site (buying a product)
Since I’m testing to see which landing page generates more opt-ins (acquisition), I’ve been given the Destination goal:
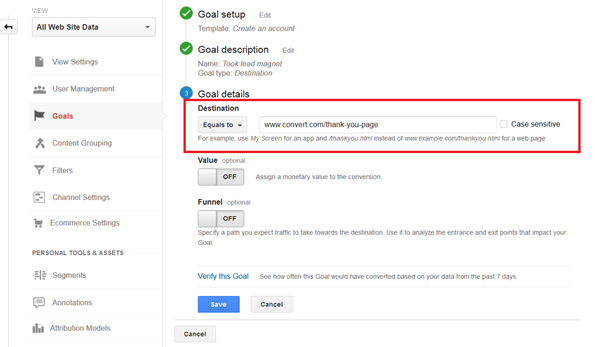
I’ve listed the destination URL as the ‘thank you page’ that all prospects are redirected to once they opt-in. Each time a prospects lands on the thank you page, a conversion will be awarded by to that page by Content Experiments. If you were measuring sales, you would set the destination page to the order confirmation URL.
Content Experiments allows you to set the conversion to a monetary value and the next possible prospects would take after reaching the destination page. Ideal when selling products and offering upsells. Once you’ve setup your goal type, click save and head back to Reports > Behaviour > Experiments to finish setting up your experiment.
Objective for this experiment
Now when you click the select a metric button you should see your newly created goal in the list:
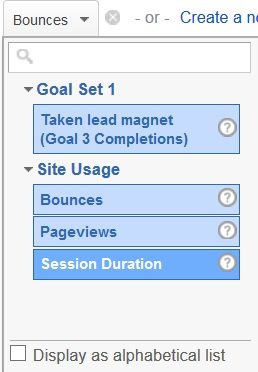
After selecting your newly created goal, your next option will be to decide how much traffic you wish to allocate to your new experiment:
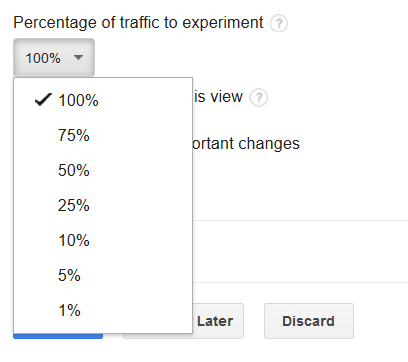
For quicker results, it would be a good idea to send larger portions of traffic to the pages tested. If you’re unsure the impact the testing page will have or are at earlier stages of testing (you haven’t figured out the problem), I suggest sending 50% or less traffic to the testing page(s).
Content Experiments will send triggered updates via emails which I highly suggest turning on to be alerted of any issues that may arise. You can save your objectives or further optimize your test using Advanced Options. Here you’ll be able to set a time frame, send traffic equally to all pages and set a confidence threshold for your experiment:
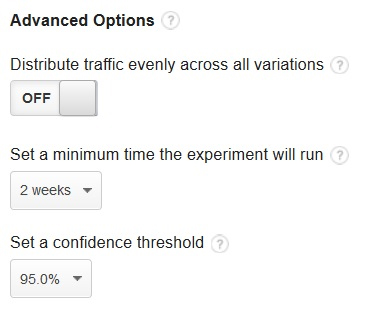
If you choose to turn off the distribute traffic evenly across all variations, Content Experiments will dynamically send more traffic to the page that has generated the most conversions. This is known as multi-armed bandit testing and you can learn more by clicking here. Setting a higher confidence threshold will result in Content Experiments taking a longer period of time selecting the winning page.
Ready for More Conversion-Boosting Tips?
Join the worldwide community of conversion optimizers at ConvCon 2017!
Configure your Experiment
Okay, so you’ve selected your objective and set the parameters for testing, now it’s time to let Google know which pages to track. The Original Page should be your current webpage and Variation 1 the page you wish to test:
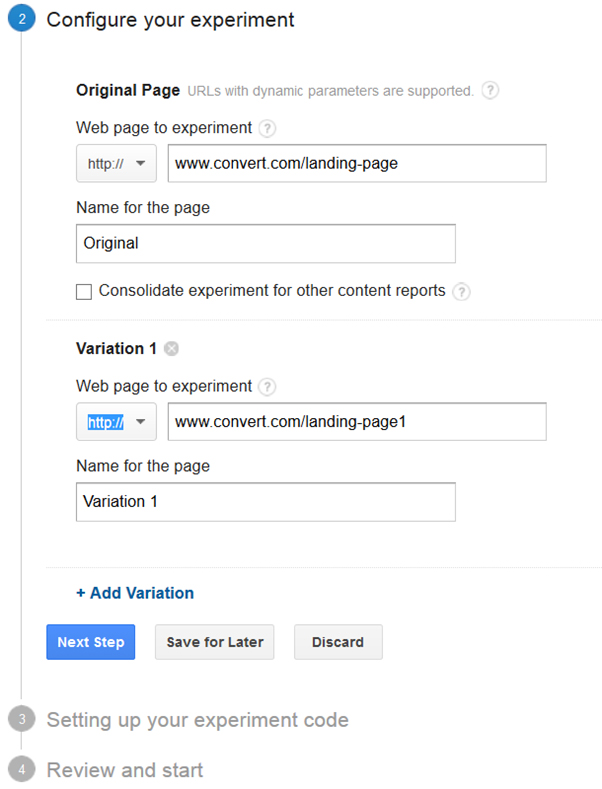
If you’re testing more than two pages, click the + Add Variation button to add more pages to the test. You can test up to 10 pages at a time.
Setting up your experiment code
We’re almost there! The final step is to add the experiment code at the top of your original page only (all testing pages must have GA tracking code installed):
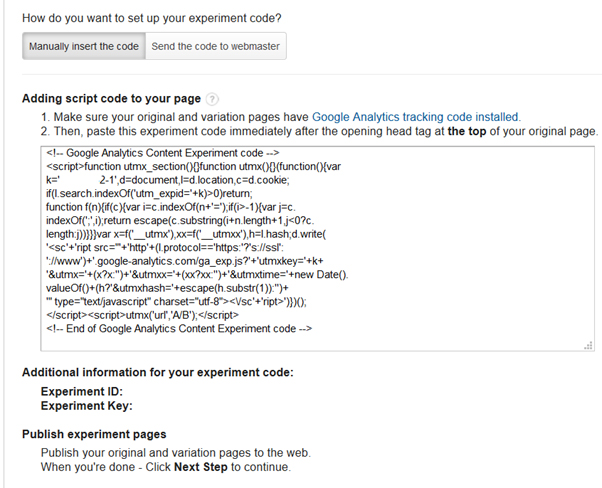
Click Next Step to review your experiment, and if everything is fine click the Start Experiment button.
And the winner is….
Over the next 2-4 weeks Google will declare the winner based on the objectives set and confidence threshold. It usually takes around 21 days or so for Content Experiments to declare a winner:
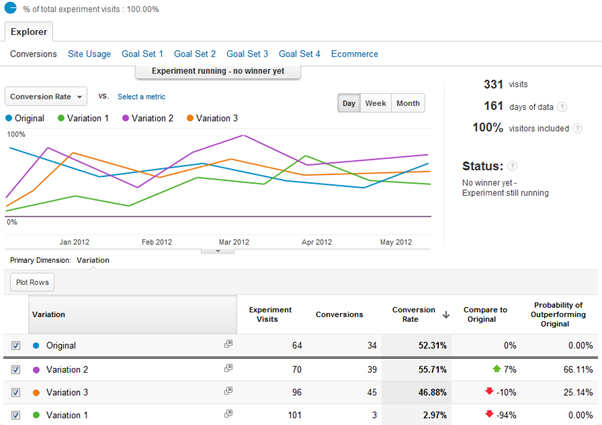
You will be able to monitor results in real-time by logging into Google Analytics and heading to Reporting > Behaviour > Experiments and then selecting your test from the Experiments dashboard.
Content Experiments and its limitations
As with most free services on the Internet, Content Experiments is not without its limitations. The biggest cons I found using the software were:
Lack of goal monitoring – Content Experiments only allows you to track event-based goals based on specific actions users made on different URLs. For example, if a customer makes it to the order confirmation page, a conversion will be counted but it won’t be linked to a specific transaction. The data you receive from these experiments can be quite limited at times.
No visual editor – Only a basic wizard is available using Content Experiments, with no advanced testing options or a visual code editor to make changes to your testing pages. Unlike Convert Experiments which offers all users a WYSIWYG interface to edit pages instantly, you’ll have to use external software, hire a coder or create new pages yourself to test variants of the original page.
Lack of statistical confidence – It’s estimated that it takes approximately 21 days (longer for sites with less traffic) before Content Experiments provides data with statistical significance.
Most experts suggest you should aim for at least 100 conversion per page variation before you even begin to consider the data provided by Content Experiments. For sites with limited traffic, not only do you have to wait a long time to gain accurate feedback, but there’s also a possibility that your experiment will never reach statistical significance.
No multivariate tests – If you’re just changing the image of a product or the color of your call-to-action, using Content Experiments you must create a brand new landing page each time. You cannot create multivariate tests on the same URL to measure several things at once, each new test must belong to a unique URL.
This means more work for you with the possibility of confusing prospects with several different URLs for a single product.
Soon replaced with Google Optimize – The next generation A/B testing software from Google is around the corner and Google Optimize is expected to launch soon. So investing to get to know Content Experiments might not be all that wise.
Conclusion
Google Content Experiments may not have all the bells and whistles other testing tools provide, but many online businesses have used it successfully to optimize their websites. For businesses with limited budgets who want to create simple A/B split tests, Content Experiments is the perfect tool to get your feet wet with conversion rate optimization. Google Content Experiments can also be used in conjunction with other conversion applications such as Convert. Convert allows users to import their Google Analytics goals, and it provides users with unlimited users and unlimited projects.
About the Author
 As Digital Marketing Lead of Convert, Fabiola Martinez is responsible for increasing brand awareness, community growth and lead generation. Always trying to improve things as a team member and as a human being.

 717 798 3495


Hi, i don’t have the “create experiment” button :(\
why is it?
Hey Adi, you’re not able to see the experiment button because you do not have enough permission settings to see that. If you have the Property or View permissions set on your account, you can see that button.